

Let me be honest with you — when I first moved into a shared room in my early twenties, I had absolutely no clue what I was doing.
My side of the room looked like a backpack exploded in it. Clothes on the chair, chargers everywhere, books stacked in random corners. My roommate — bless her — never said anything directly, but I could feel the tension every time she had to move my stuff just to sit down.
It took a few uncomfortable conversations, one very embarrassing “where did my laptop go” incident (it was under my own pile of hoodies), and honestly a lot of trial and error before I figured out what actually works in a small shared space.
So if you’re currently living in a shared room or about to move into one, I’m going to save you from going through what I did. These are seven real, practical hacks I’ve either personally used or watched work incredibly well.
1. Define Your “Zones” Before You Unpack Anything
This sounds simple, but almost nobody does it — and it makes a massive difference.
Before you start shoving things into drawers or hanging stuff up, sit down with your roommate (even if it’s awkward at first) and literally divide the room into zones. Not just “your side” and “my side,” but specific-use zones.
For example:
- Study zone (shared desk or individual desks)
- Sleep zone
- Storage zone (wardrobe, under-bed, shelf units)
- Shared common area (maybe a small table or mini fridge)
When you define these early, you avoid the silent war that slowly builds when one person’s stuff keeps creeping into the other’s area. I’ve seen this “zone drift” destroy perfectly good roommate relationships over time.
A simple way to do this is use masking tape on the floor the first day just to visualize. Sounds a bit over the top, but it genuinely helps both people see boundaries clearly before they’re invisible and assumed.
2. Use Vertical Space Like Your Life Depends On It
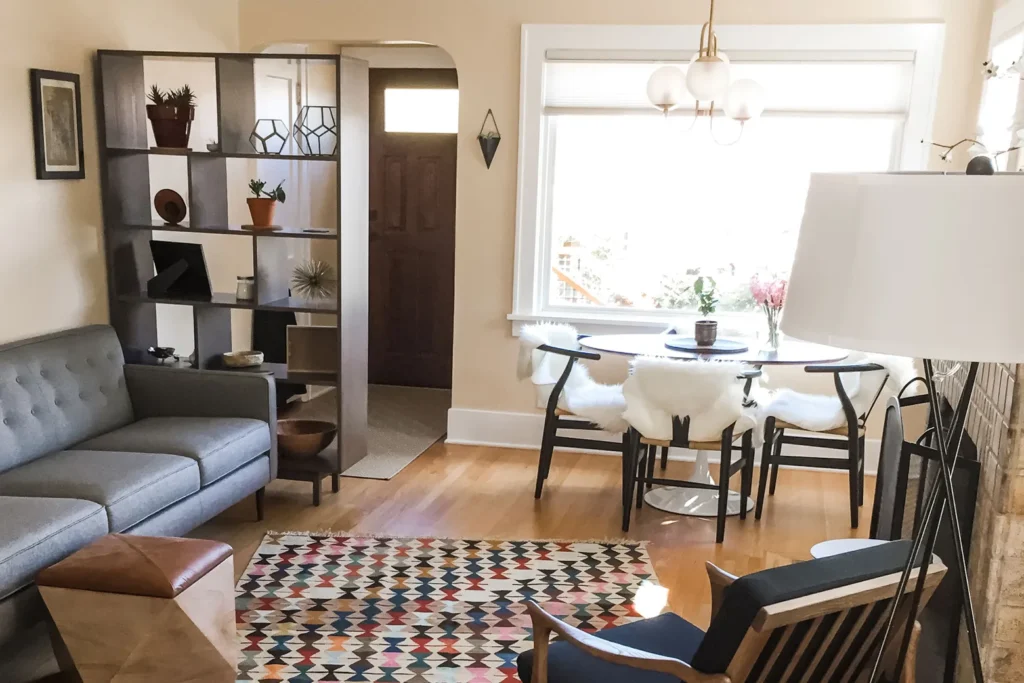
Floor space in a shared small room is basically gold. Once you accept that, you start looking UP.
Walls, the back of doors, the space above wardrobes — all of this is usable storage that most people completely ignore.
Here are some vertical storage solutions that have worked really well:
Over-the-door organizers — These are game-changers. One on the back of your wardrobe door can hold shoes, accessories, stationery, even snacks. No floor space used, no shelf needed.
Wall-mounted floating shelves — If your landlord allows it, even two or three small shelves can free up your desk and floor completely. If you can’t drill holes, there are adhesive shelf brackets that hold a surprising amount of weight.
Stackable storage boxes — Instead of spreading things horizontally, stack them. Labeled boxes (yes, actually label them) are a lifesaver when you’re looking for something specific.
I personally used a combination of an over-door shoe organizer and a small pegboard above my desk. The pegboard held my headphones, scissors, a small plant, and a few hooks for bags. It honestly transformed my corner of the room from chaotic to clean in a single afternoon.
If you’re still figuring out the basics of shared living before you even move in, 10 Smart Room Sharing Tips for Rent-by-Room Living is a solid starting point.
3. The “One In, One Out” Rule (And Why You Need It)
This was the single biggest mindset shift for me.
Every time something new comes into your space — a new bag, a new jacket, a new gadget — something old has to go. Donate it, sell it, trash it, whatever. But it cannot stay in the room.
Small shared rooms fill up at an almost alarming speed. You don’t notice it happening gradually until suddenly there’s genuinely nowhere to put anything and the room feels suffocating.
The “one in, one out” rule forces you to be intentional about what you own. It sounds a bit extreme but after a while, it just becomes habit.
I actually kept a small “donate box” in my wardrobe. Whenever something went in that box, I knew when it got full, it was time to drop it off. Zero guilt, no big decisions, just a rolling process.
4. Label Everything (Seriously, Everything)
I know labelling sounds like something your primary school teacher made you do, but hear me out.
In a shared room, things get mixed up. Chargers, toiletries, stationery, even food if you share a mini fridge — when nothing is labeled, everything becomes a mystery and occasional source of minor conflict.
What to label:
- Storage boxes and bins
- Chargers and cables (a small piece of tape and a marker is enough)
- Shelf sections if you share a bookshelf
- Your side of the wardrobe if you share one
A label maker (the Brother P-Touch is a cheap, popular option) makes this look clean and intentional. But even hand-written tape labels work perfectly fine.
The psychological effect of labelling is also interesting — when a space is clearly defined and labeled, people naturally respect it more. It removes the ambiguity that causes mess to build up.
5. Have a Weekly 10-Minute Reset
This one I learned from a roommate who was genuinely one of the most organized people I’ve ever lived with.
Every Sunday evening, she’d spend exactly 10 minutes resetting the room. Not deep cleaning — just putting things back where they belonged. Folding the clothes on the chair, wiping down the desk, putting books back on the shelf.
At first I thought it was a bit extra. By week three, I was doing it too.
The reason it works is that small rooms don’t need big cleaning sessions — they need consistent micro-resets. One 10-minute tidy every week prevents the slow accumulation of chaos that makes you dread being in your own room.
You can even make it easier with a quick checklist on your phone:
| Task | Done? |
|---|---|
| Clear desk surface | ✅ |
| Put clothes away | ✅ |
| Tidy floor corners | ✅ |
| Wipe shared surfaces | ✅ |
| Empty small bins | ✅ |
Simple, takes no time, and the difference it makes is wildly disproportionate to the effort.
6. Get Smart About Under-Bed Storage
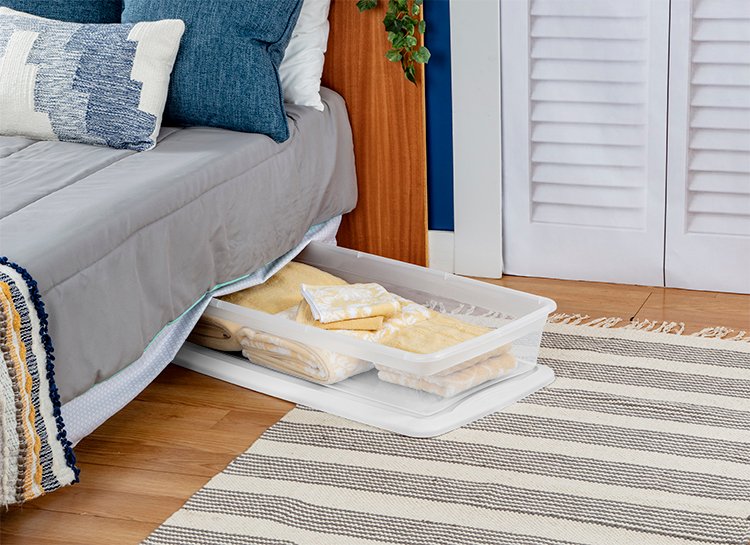
Under the bed is the most underused storage area in almost every small shared room I’ve ever seen.
Most people either stuff random things under there in a chaotic pile (guilty) or don’t use it at all. Both are missed opportunities.
Here’s how to actually use under-bed storage properly:
Flat storage boxes with lids — These are ideal for seasonal clothes, extra bedding, or shoes. The key word is flat. You want low-profile boxes that slide in and out easily without getting stuck.
Vacuum storage bags — These are almost magical. You can compress a whole winter wardrobe into flat bags and slide them under the bed. Brands like Spacesaver or even generic ones from Amazon work well. The space savings are genuinely impressive.
A rolling drawer unit — If your bed frame is high enough, a small rolling drawer unit fits perfectly underneath. It gives you actual organized drawers without needing any extra floor space.
The most common mistake I see? Shoving things under the bed without any system. Within a month, it becomes a black hole where things go to be forgotten. Boxes and bags are the only way to keep it functional.
For more ideas on sharing spaces without driving each other crazy, check out 12 Powerful Room Sharing Rules for Peaceful Living.
7. Create a Shared Agreement on Common Spaces
This last one is less about physical organization and more about something that actually holds it all together — communication.
The tidiest storage system in the world falls apart if one person treats shared surfaces as their personal dumping ground.
A shared room agreement doesn’t need to be formal or weird. It’s literally just a quick conversation (or even a casual text thread) where you both agree on a few basic things:
- How often do we tidy the shared desk/table?
- Where do guests’ belongings go when they visit?
- What’s the rule on food/drinks in the room?
- What do we do when one person’s stuff is blocking the other’s space?
Having this conversation before things become an issue is infinitely easier than having it after resentment has built up.
I actually made the mistake of skipping this conversation in one of my shared rooms. By month two, I had strong opinions about where things should go and so did my roommate — but we’d never actually discussed it. The result was passive-aggressive tidying and silent frustration that could’ve been completely avoided.
A five-minute conversation at the start saves weeks of tension later. That’s genuinely one of the best organizational tools you have.
Here’s a quick comparison of what tends to happen with and without a shared agreement:
| Situation | Without Agreement | With Agreement |
|---|---|---|
| Shared desk gets cluttered | Tension builds silently | Quick, guilt-free conversation |
| Guest comes over | Stuff piles up everywhere | Clear temporary storage spot |
| One person is messy | Resentment grows | Known expectations already set |
| Cleaning day disagreement | Avoided or argued | Agreed schedule already in place |
Common Mistakes That Undo All Your Hard Work
Before I wrap up, let me quickly flag the things I see people do that instantly unravel even the best organization systems:
Buying storage before assessing your space — So many people (me included, once) buy a bunch of organizing products before actually measuring or mapping the room. You end up with boxes that don’t fit, shelves that are too wide, or drawer units that block the door.
Organizing alone without involving your roommate — If you reorganize a shared space without talking to your roommate first, even with good intentions, it usually causes friction. Always loop them in.
Overcomplicating the system — I’ve seen elaborate color-coded, app-tracked organizational systems collapse within two weeks because they required too much upkeep. Simple systems that require minimal effort are the only ones that last.
Ignoring the “transition areas” — These are spots like the floor by the door, the chair, the edge of the desk — places things land temporarily and then just… stay. Put a small basket or hook in these spots to catch the clutter before it spreads.
If you want to go deeper on avoiding the pitfalls of shared living spaces, 11 Room Sharing Mistakes You Must Avoid covers a lot of the traps that catch people off guard.
A Few Tools Worth Mentioning
These are products and tools that have genuinely helped me or people I know:
| Tool/Product | What It’s Good For | Approx. Cost |
|---|---|---|
| Brother P-Touch label maker | Labelling boxes, cables, shelves | $20–$35 |
| Spacesaver vacuum bags | Compressing seasonal clothing | $15–$25 |
| Over-door organizer (IKEA SKUBB) | Shoes, accessories, small items | $10–$20 |
| Stackable clear bins | Under-bed or wardrobe storage | $10–$30 |
| Adhesive wall hooks (Command brand) | Bags, coats, headphones | $5–$15 |
| Floating wall shelves | Vertical space for books/decor | $15–$40 |
None of these are expensive individually, and you don’t need all of them at once. Start with whatever solves your biggest current pain point.
Living in a shared small room doesn’t have to feel cramped or chaotic. Most of the time, the mess isn’t caused by having too much stuff — it’s caused by having no clear system for where things belong. Once you define zones, use your vertical and under-bed space, keep up with small resets, and have one honest conversation with your roommate, the whole dynamic of the room shifts.
It genuinely took me too long to figure this out. Hopefully it takes you a lot less time.